So, you want to establish real-time audio and video in your Flutter app. This is a common requirement for app developers, especially post-pandemic since everyone wants to interact online almost as easily as they do in real life.
One of the most effective ways to go about this is to use WebRTC.
This article will demonstrate how to use WebRTC and implement real-time audio-video communication in a Flutter app.
Note: This piece assumes that you are already familiar with app development in Flutter and will focus on WebRTC integration with a Flutter app.
How to build a Flutter WebRTC app
We’ll start by building a new Flutter project and then go deeper into how WebRTC works. But first, let’s take a moment to answer the question: “What is WebRTC?”
WebRTC is an HTML specification that enables real-time, audio-video communication between websites and devices. It comprises networking, audio, and video components standardized by the Internet Engineering Task Force and the World Wide Web Consortium.
Simply put, WebRTC is an open-source project that allows direct P2P communication without installing additional programs or plugins. It can be used on all modern browsers to establish peer-to-peer communication and can also be embedded into native applications using available libraries.
We’ll discuss WebRTC in more detail later in the article. For now, let’s start building a Flutter WebRTC app.
First of all, let’s create a new Flutter project
flutter create webrtc_flutterWe’ll refactor some code and get rid of the comments.
The first step is to add the Flutter WebRTC plugin based on Google WebRTC. Using this, we can develop the app in Flutter for mobile, desktop, and the web.
Run the following code in the terminal to add flutter_webrtc as a dependency in your pubspec.yaml file:
flutter pub add flutter_webrtcAccess Camera and Microphone on iOS
Add the following permission entry to your Info.plist file, located in <project root>/ios/Runner/Info.plist:
<key>NSCameraUsageDescription</key>
<string>$(PRODUCT_NAME) Camera Usage!</string>
<key>NSMicrophoneUsageDescription</key>
<string>$(PRODUCT_NAME) Microphone Usage!</string>Android Manifest File Changes
To enable user permissions on Android, add the following to the Android Manifest file, located in <project root>/android/app/src/main/AndroidManifest.xml:<uses-feature android:name="android.hardware.camera" />
<uses-feature android:name="android.hardware.camera.autofocus" />
<uses-permission android:name="android.permission.CAMERA" />
<uses-permission android:name="android.permission.RECORD_AUDIO" />
<uses-permission android:name="android.permission.ACCESS_NETWORK_STATE" />
<uses-permission android:name="android.permission.CHANGE_NETWORK_STATE" />
<uses-permission android:name="android.permission.MODIFY_AUDIO_SETTINGS" />Add the following if you wish to use a Bluetooth device:
<uses-permission android:name="android.permission.BLUETOOTH" />
<uses-permission android:name="android.permission.BLUETOOTH_ADMIN" />
build.gradle Changes
Currently, the official WebRTC jar uses static methods in the EglBase interface. So, you will need to change your build settings to Java 8. To do so, add the following code to app-level build.gradle:
android {
    //...
    compileOptions {
        sourceCompatibility JavaVersion.VERSION_1_8
        targetCompatibility JavaVersion.VERSION_1_8
    }
}
if necessary, in the same build.gradle, you may need to increase the minSdkVersion of defaultConfig to 23 (currently, the default Flutter generator has set it to 16).
Our initial objective is to show the local user's video in the app. We’ll start from there and go on to connect to a remote user and establish a P2P connection using WebRTC.
Let’s start by writing the Dart code.
Our initial objective is to show the local user's video in the app. We’ll start from there and go on to connect to a remote user and establish a P2P connection using WebRTC.
Let’s start by writing the Dart code.
Rendering a Local User
Inside the stateful MyHomePage() widget, we’ll initialize a localVideoRenderer for the same.The RTCVideoRenderer lets us play video frames obtained from the WebRTC video track. Depending on the video track source, it can play videos from a local peer or a remote one.
final _localVideoRenderer = RTCVideoRenderer();

  void initRenderers() async {
    await _localVideoRenderer.initialize();
}@override
void initState() {
initRenderers();
super.initState();
}
It also needs to be disposed of. Disposing of the renderer stops the video and releases the resources associated with it.
@override
  void dispose() async {
    await _localVideoRenderer.dispose();
    super.dispose();
  }
The getUserMedia() function will prompt the user to allow an input device to be used. The said device will generate a Media Stream with the requested media types. This stream will have an audio track generated from an audio source such as a microphone (or others) and a video track from a camera, recording device, etc.
Moving on, we create a new function named getUserMedia() and call it in initState() as shown below:
_getUserMedia() async {
    final Map<String, dynamic> mediaConstraints = {
      'audio': true,
      'video': {
        'facingMode': 'user',
      }
    };

    MediaStream stream =
        await navigator.mediaDevices.getUserMedia(mediaConstraints);
    _localVideoRenderer.srcObject = stream;
  }

  @override
  void initState() {
    initRenderers();
    _getUserMedia();
    super.initState();
}Let us modify the build method of the stateful widget as:
@override
Widget build(BuildContext context) {
return Scaffold(
appBar: AppBar(
title: Text(widget.title),
),
body: Stack(
children: [
Positioned(
top: 0.0,
right: 0.0,
left: 0.0,
bottom: 0.0,
child: RTCVideoView(_localVideoRenderer))
],
),
);
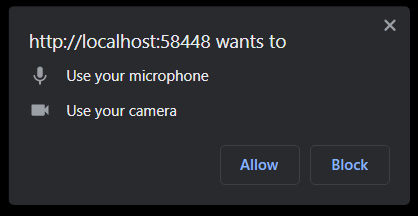
}Flutter WebRTC demo
First of all, the app will ask for permission when we first run it.